Adjustment Guides
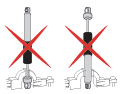
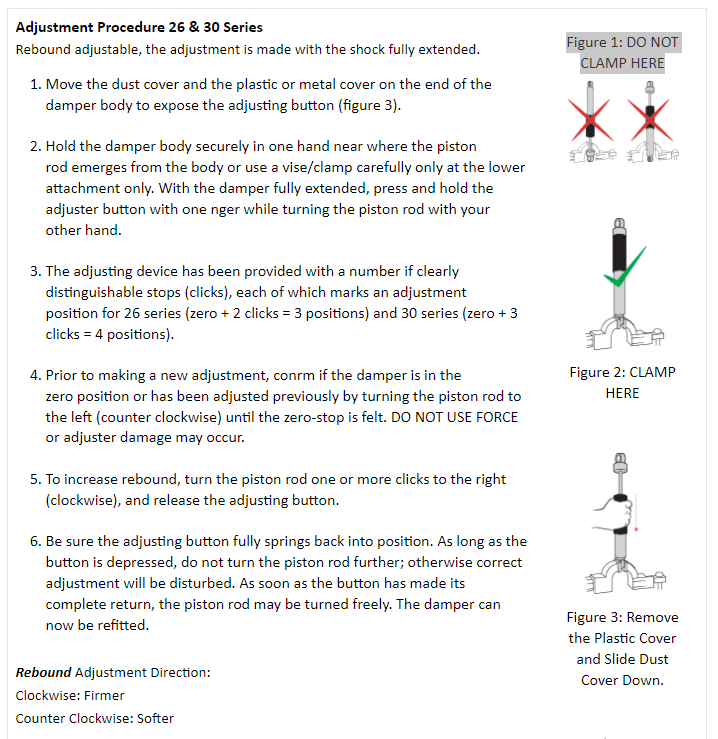
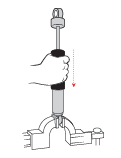 Figure 3: Remove the Plastic Cover and Slide Dust Cover Down. Adjustment Procedure T1N Sprinter Van Koni Series Rebound Adjustment Direction: Clockwise: Firmer Counter Clockwise: Softer 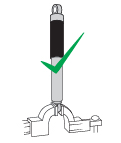 Figure 2: CLAMP HERE 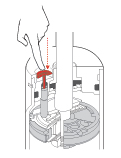 Figure 4: The Handy Depressor Button. Depress the button while turning clockwise to give increased damping forces. Rebound adjustable, the adjustment is made with the shock fully extended. Move the dust cover and the plastic or metal cover on the end of the damper body to expose the adjusting button (figure 3). Hold the damper body securely in one hand near where the piston rod emerges from the body or use a vise/clamp carefully only at the lower attachment only. With the damper fully extended, press and hold the adjuster button with one longer while turning the piston rod with your other hand. The adjusting device has been provided with a number if clearly distinguishable stops (clicks), each of which marks an adjustment position for 26 series (zero + 2 clicks = 3 positions) and 30 series (zero + 3 clicks = 4 positions). Prior to making a new adjustment, confirm if the damper is in the zero position or has been adjusted previously by turning the piston rod to the left (counter clockwise) until the zero-stop is felt. DO NOT USE FORCE or adjuster damage may occur on you new 2001-2006 T1N Sprinter Van Shock or Strut. To increase rebound, turn the piston rod one or more clicks to the right (clockwise), and release the adjusting button. Be sure the adjusting button fully springs back into position. As long as the button is depressed, do not turn the piston rod further; otherwise correct adjustment will be disturbed. As soon as the button has made its complete return, the piston rod may be turned freely. The damper can now be refitted. Rebound Adjustment Direction: Clockwise: Firmer Counter Clockwise: Softer 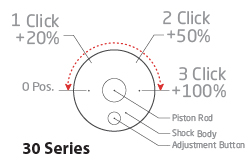  |