T1N SPRINTER 15” AND 16” OVER-THE-LUG MOUNTING SYSTEM FRONT SIMULATOR INSTRUCTIONS
FOR 2006 AND EARLIER
VERY IMPORTANT! Read And Understand These Steps Before Installation
STEP 1
Installing The 2001-2006 T1N Sprinter Van Mounting Brackets
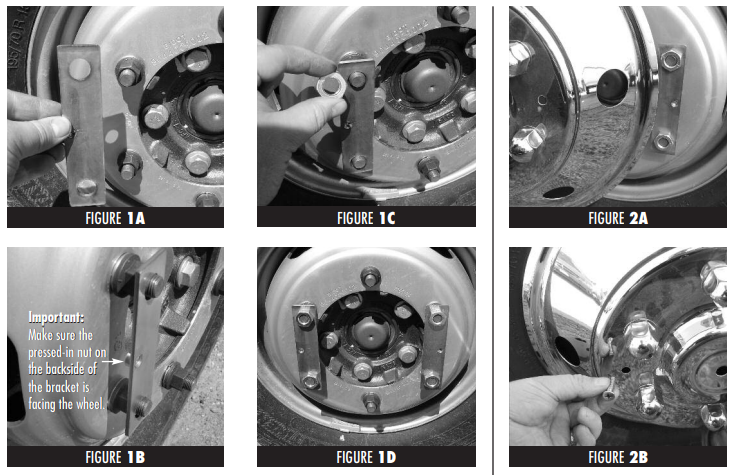
• If applicable begin by removing the factory black plastic hubcaps with a 19mm lug wrench. Then securely
re-install the lug nuts that were removed from the wheel.
• Next, place one of the front mounting brackets on top of two lug nuts. Important: Make sure the
pressed-in nut on the backside of the bracket is facing the wheel. (See Figs. 1A & 1B)
• Next, thread two jam nuts over the bracket onto the wheel studs. (See Fig. 1C)
• Repeat the same process for the other side and tighten securely. (See Fig. 1D)
IMPORTANT: DO NOT USE AIR TOOLS TO TIGHTEN THE BRACKET JAM NUTS.
STEP 2
Mounting The 2003-2006 T1N Sprinter Van Simulator To The Wheel
• Place wheel simulator onto the wheel making
sure to line the holes in the simulator with the
threaded holes of the mounting brackets.
(See Fig. 2A)
• Then thread two Phillips head screws through the
T1N Sprinter Van 15” AND 16”simulator and into the threaded holes of the
mounting brackets and tighten securely.
(See Fig. 2B)
• Repeat the same process on the other wheel and
you’re finished.
STEP 1
Installing The STEP 2
Mounting The 2001-2006 T1N Sprinter Van Simulator To The Wheel Mounting Brackets
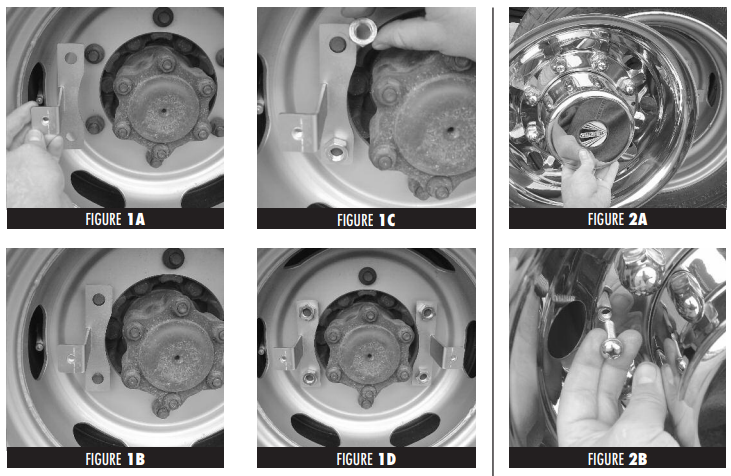
• If applicable begin by removing the factory black plastic hubcaps with a 19mm lug wrench. Then securely
re-install the 2001-2006 T1N Sprinter Van lug nuts that were removed from the wheel.
• Next, place one of the rear mounting brackets on top of two lug nuts. (See Figs. 1A & 1B)
• Next, thread two jam nuts over the bracket onto the wheel studs. (See Fig. 1C)
• Repeat the same process for the other side and tighten securely. (See Fig. 1D)
IMPORTANT: DO NOT USE AIR TOOLS TO TIGHTEN THE BRACKET JAM NUTS.
STEP 2
Mounting The Simulator To The Wheel
• Place wheel simulator onto the wheel making
sure to line the holes in the simulator with the
threaded holes of the mounting brackets.
(See Fig. 2A)
• Then thread two Phillips head screws through the
simulator and into the threaded holes of the
mounting brackets and tighten securely.
(See Fig. 2B)
• Repeat the same process on the other wheel and
you’re finished.